Tuesday, 19 October 2010

CAMERA TEST, STUDIO DESIGN, LIGHTING PLAN, LOCATION PLAN

In this blog I talk about how we camera tested for our cast, designed our lighting and studio plan and organised our location.

Camera Test; We looked through the list of students through out the school and we hand picked 10 students, female and male. We asked each of them to play a character in our pop video and invited them to the studio later in the week for a camera test. All the students we had picked fitted the look that we needed for our video, but camera testing every one is crucial because many people do not 'look good' on film. We were looking for people who were confident in front of the camera. They should be expected to move well, with dramatic facial expressions and a rebellious persona. Initially, the problem was finding 'gangsters' within school. We did not want to create a generic product, but a 'real gangter'. Luckily for us, many students study drama and with the use of costumes we can emphasise appearances and perceptions of each character. Most of the students turned up for the camera testing...We shot them from a wide-shot and a close-up of their faces to ensure that they fitted our criteria of the character. Fortunately, all of the students are pleasent and seem like they will take good criticism on the day and listen to the specific requirements for their character. OUR CAMERA TEST IS ATTACHED BELOW.

Design Plans; The plan allowed us to overview our ideas of shooting in the studio and the derelict factory externally from school. We drew out a birds-eye-view plan of the studio lighting and positions. For the studio plan, we drew out the DJ and the 'decks' in the center, with the curtain and graffiti wall. We planned to place two white spot lights lighting up the wall, and another facing directly up to the DJ. We hope that the shilloutes and shadowing will create a large emphasise of the image and message. It may even add a theme of mystery through darkness. To the right is a scan of our lighting and set plan. With using an external location, we only had to plan our lighting and set for the studio.

CAMERA TEST


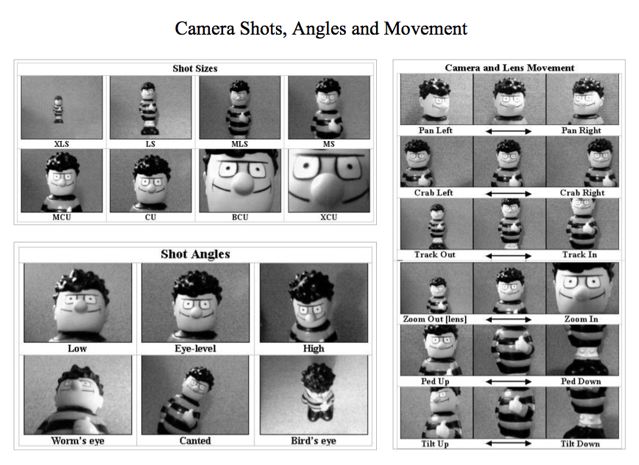
These images show the similar equipment that we will be using for our video...


STORYBOARD

The storyboard builds on the Timeline to visualise the shot and work out the type of shot to use and why is is used. Why tracking or craning is used and why, and finally why we shoot to edit and why. Much like the Timeline, we can see what works and what cannot. Storyboarding is a more in depth technique of structuring our narratives and helps with the progression of our ideas and plans. The storyboard is he plan which we shoot to, so if it works on paper it should work on the shoot day. This can prevent wasting time and save expence for the video. The storyboard works out the type of shotm the anglesm the camera movement, the colours and shapes, the mise en scene and how the image composition rules will be applied in the film. Anything and everything is thought about in the storyboard so that the shoot day is as quick and easy as it can possibly be. This is crucial, as we only have one day to shoot.


The second cene of our video will be the DJ performance. It will be filmed in the studio using a graffitied wall. We will be making this from corigated iron, old rough posters and graffiti. However, in this shot we will cover the wall with a black curtain. The simplisity of the shot will hopefully intise the audience and enhance the tension of the narrative. The DJ will be intensly playing on the 'decks' in front of the wall. A small selection of white spot lights will be used on the Dj and the curtain. We may use a 'canted angle', which could convey an odd world within our surburban evironment.


We will be using tracking in shot five. The scene will be made up of the two 'gangs' who are walking towards one another in the derelict factory. The tracking allows the audience to be in the position of the action which will create intimisy between the action and the audience. This keeps audiences interested within the action and encourages them to follow the anrrative. Aesthetically, tracking can we extremely pleasant to the eye, once again encouraging the audience to concentrate and stay with the action of the video.


An idea of an editing technique that we may use is the variations of colours and black and white. Shot 12, as shown in the storyboard could be filmed in black and white. Thr graphics on the wall and the simplicity of the DJ's costume and performace can be emphasised. This will prevent any distraction from the narrative or the subject.

I had researched tutorials of storyboarding before I created mine. I found this video sepcifically interesting and usseful to ensure that my storyboard was accurate and organised correctly.
http://howtostoryboard.com/dvd/

These are some other examples of clear and specific storyboards...

TIMELINE

Timelines use the music and the times for our pop video structure. This is our first time at trying to link images and the music.This timeline has helped our group to synchrinize the music with our imagery. We have planned out each shot from 0 seconds to 3 minutes, 2 seconds. Dividing each shot became harder as we got further through the timeline. It became a struggle to balance out both narratives of the gangs ad the DJ performance. However, this gave us an opportunity to to create new ideas that fitted with timings and relevant ideas. From these timeline examples, you can see what works and what does not.


This particular timeline has helpd our group to synchrinize our ideas with the timing of the music. Unfortuately, our song does not include lyrics. Oblivious to this, we have created aethetically pleasing scenes to keep the audiences interested. We had to follow the rhythm and any outstanding parts of the song, here we would create more dramatic visually stimulating secenes. However, I think our group we have had a slight advantage in that the lyrics could not possibly distracted the audiences from the narrative of the video. Therefore, our narratives and action with in the video will be far more effective and personal to audiences.

Monday, 18 October 2010

COMPOSITION RULES OF FILM MAKING

Films, videos and TV all work because they use ‘language’ of their own that is visually stimulating. Khuleshov claims that 70% of the information we receive through media pieces is through imagery. As a film maker, we must understand and use the ‘language’ to create successful pieces of work. All of the composition rules are what we call the grammar and vocabulary which makes up the message within the language. The following are some of the key rules that I will try to use on my pop video;

1. Different Type of Shot Size
Extreme Close-Ups, Close-Ups, Mid-Shots, Long-Shot, Extreme Long-Shot and Wide-Shots are some shot types that are used to create atmospheric moods or specific messages. Close-Ups would be used when wanting to promote the specific product/character. It allows the audience to view the subject multiple times and helps to repeat the image in their minds for a memorable scene. On the other hand, Long-shots are used to establish the scene and gather as much information, in a short period of time. Long-shots are traditionally use in scenes of fighting. It gives the audience a chance to make decision of each character and separate the villains from the heroes. The Wild Bunch uses many long-shots to establish the progress of the fight, as well as using hand held cameras in which they can create a more intimate motion to the scene.


2. Camera Position and Angle
The positioning of the camera can suggest many a thing when interviewing of shooting a scene; Using a flat on shot creates a very boring participant, where as angling the camera by 35 degrees creates an exact depth of field. It can create good shadows and emphasise the participant’s features in a good light. Filming at a higher angle allows the audience to believe that the subject is a humble, mellow and down-to-earth character. Oppositely, at a low angle the character can look arrogant and powerful.

3. Lighting
Lighting is an essential element of filming, whether using natural light or tungsten lighting. Redheads and Blonde lights are used to create different atmospheres, depending on what is being filmed. When interviewing, the subject is normally flooded by a spot light. 32 degrees from there a fill light is used to create shadows and directly behind the subject, back lighting is used to create depth of field.


4. Rule of Thirds
Using the rule of thirds can subvert of follow a storyline. Typically, the first two hot spots would be used for the most popular character e.g Mike in The Wild Bunch. He is know automatically seen as the hero in the film and the the Mexican army are placed in the fourth hot spot. This is normally for the mysterious, rebellious characters of the film.


5. Leading to the eye
Within film making, almost one of most essential elements is to encourage the viewer to follow the main character or subject. This can be done in two ways; rule of thirds or converging lines.
The rule of thirds uses hot spots to entice the viewer to look at specific areas of the shot, before any other spot. Automatically, the eye is drawn to the top left of the shot, so this leads the eye to a certain point of the scene. The director, more often than not would use converging lines. Within the set, props and materials could be used to create converging lines, in which, again the viewer would follow. For example, the use of a pier can be seen as a technique of converging lines, where the viewers will follow it up to the end where the water begins. The use of converging lines does sometimes present messages of the end, the beginning of an intimating, bold statement about the character or the overall narrative.

6. Colours
Colours within films are always used to create moods, biases or opinions. The Wild Bunch opens with seedy, grainy colours of brown but flashes to black. Black is seen as a rebellious, bad colour that conveys The Wild Bunch as the ‘villains’ in the film. The use of dusty, nearly sepia colour effect emphasises the dusty, ‘cowboy’ stereotype of ‘cops and robbers.’


7. Editing Styles
The Wild Bunch uses balletic editing within the scenes to create a sense of continuity and a flowing storyline. It intends to cut each scene and start the scene in the same place that it left off. The eye can follow each cut from where they last saw it. Using a oval shape of balletic editing gives the viewer a chance to follow the storyline, easily. Creating a smooth watch.